One of my favourite descriptions of Remix came from Michael Jackson:
[Remix is] like React Router plus… it’s like React Router taken to the next level.
— Michael Jackson, Chats With Kent C. Dodds, S4:EP10
Describing it as a supercharged React Router highlights one of the most powerful features of Remix that often gets overlooked: nested routing.
What is Nested Routing
To understand what nested routing is, let’s look at a settings page on GitHub, https://github.com/settings/appearance.
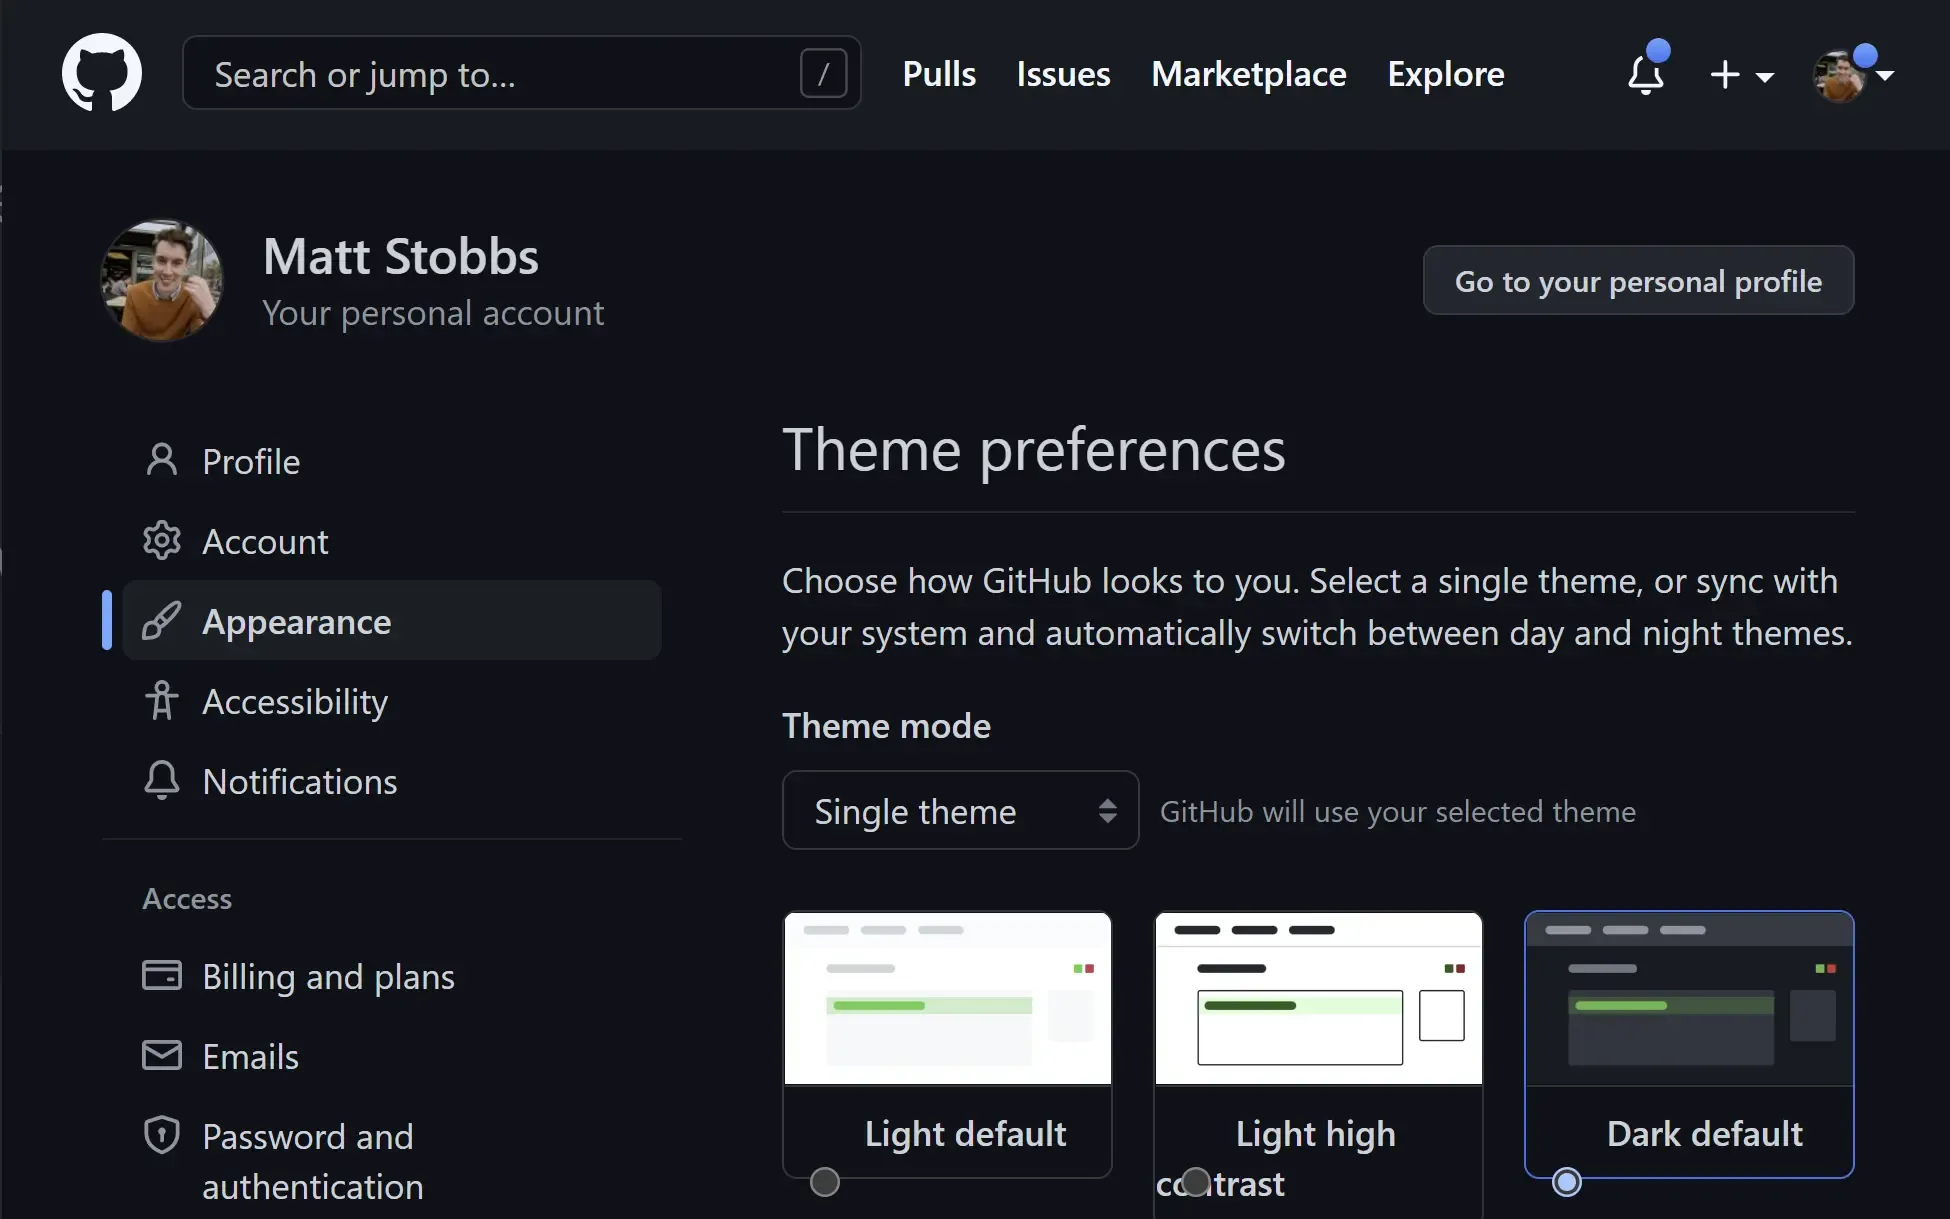
The URL can be split into 3 parts: https://github.com > settings > profile
We can map these three parts to three sections of the UI:
- The header, which is common to all GitHub pages
- The sidebar, which is common to all the settings pages
- The main content, which is unique to the appearance settings page
In Remix, each section can be associated with a route. And each route is defined by the file structure. For example:
app/root.tsxis the root route. This defines the code that is common across all pages. In our example, this is where we would put the navbar.app/routes/settings.tsxis the settings route. This describes the components of all pages that start with the URLgithub.com/settings/. In our example, this is the sidebar.app/routes/settings/appearance.tsxis the appearance route. This describes the components on the URLgithub.com/settings/appearance. This is the rest of the content on the page in our example.
Nested routing allows us to create layout components that are shared across multiple pages, but it also unlocks a lot more than that.
Performance
When a page is requested, Remix knows all the assets and data that needs to be loaded just by looking at the URL. In other words, it doesn’t need to run any code before knowing what needs to be loaded. This is one of the reasons Remix is able to avoid the request waterfall that are typical in most apps.
In addition, when we navigate from one GitHub settings page to another, the entire page reloads. The routes are associated with a whole page so when the route updates, the entire page updates.
In Remix, only a section of the page is associated with a route. So when the route changes, only that section needs to change.
This makes page transitions lightning fast.
It also means that we don’t need to reload the data for parent routes. For example, the sidebar doesn’t need to reload the username or profile image because the settings route has already loaded that data.
Finally, it also allows us be creative with route transitions, like this:
Styling
The primary way to style in Remix (and the web) is to add a
<link rel="stylesheet">to the page.
— Remix docs
Each nested route can define stylesheets using the Route Module links export.
export function links() {
  return [
    {
      rel: 'stylesheet',
      href: 'https://unpkg.com/modern-css-reset@1.4.0/dist/reset.min.css',
    },
  ];
}
This stylesheet will only be added to the page when this route is active. Once the user navigates to a different route, remix removes the stylesheet.
This means instead of having global CSS files, we can have route-specific CSS files.
- Global styles can be added to the root route
- “Setting page”-specific styles can be added to the settings route
- “Appearance settings”-specific styles can be added to the appearance route
This makes it a lot easier to control the CSS as your site grows. It reduces the amount of overhead from checking “if I add this CSS rule, will it affect this random element on a completely different page”.
It also reduces the amount of CSS sent to the user because they’re only sent what they need for that specific route, decreasing page load times.
Error Handling
In addition to having route-specific links, Remix also allows you to define route-specific errors.
export function ErrorBoundary() {
  return (
    <div className="error-container">
      Something unexpected went wrong. Sorry about that.
    </div>
  );
}
When an error boundary is triggered, only the associated route is replaced by the error. All the other parent routes remain on the page and function as though there was no error.
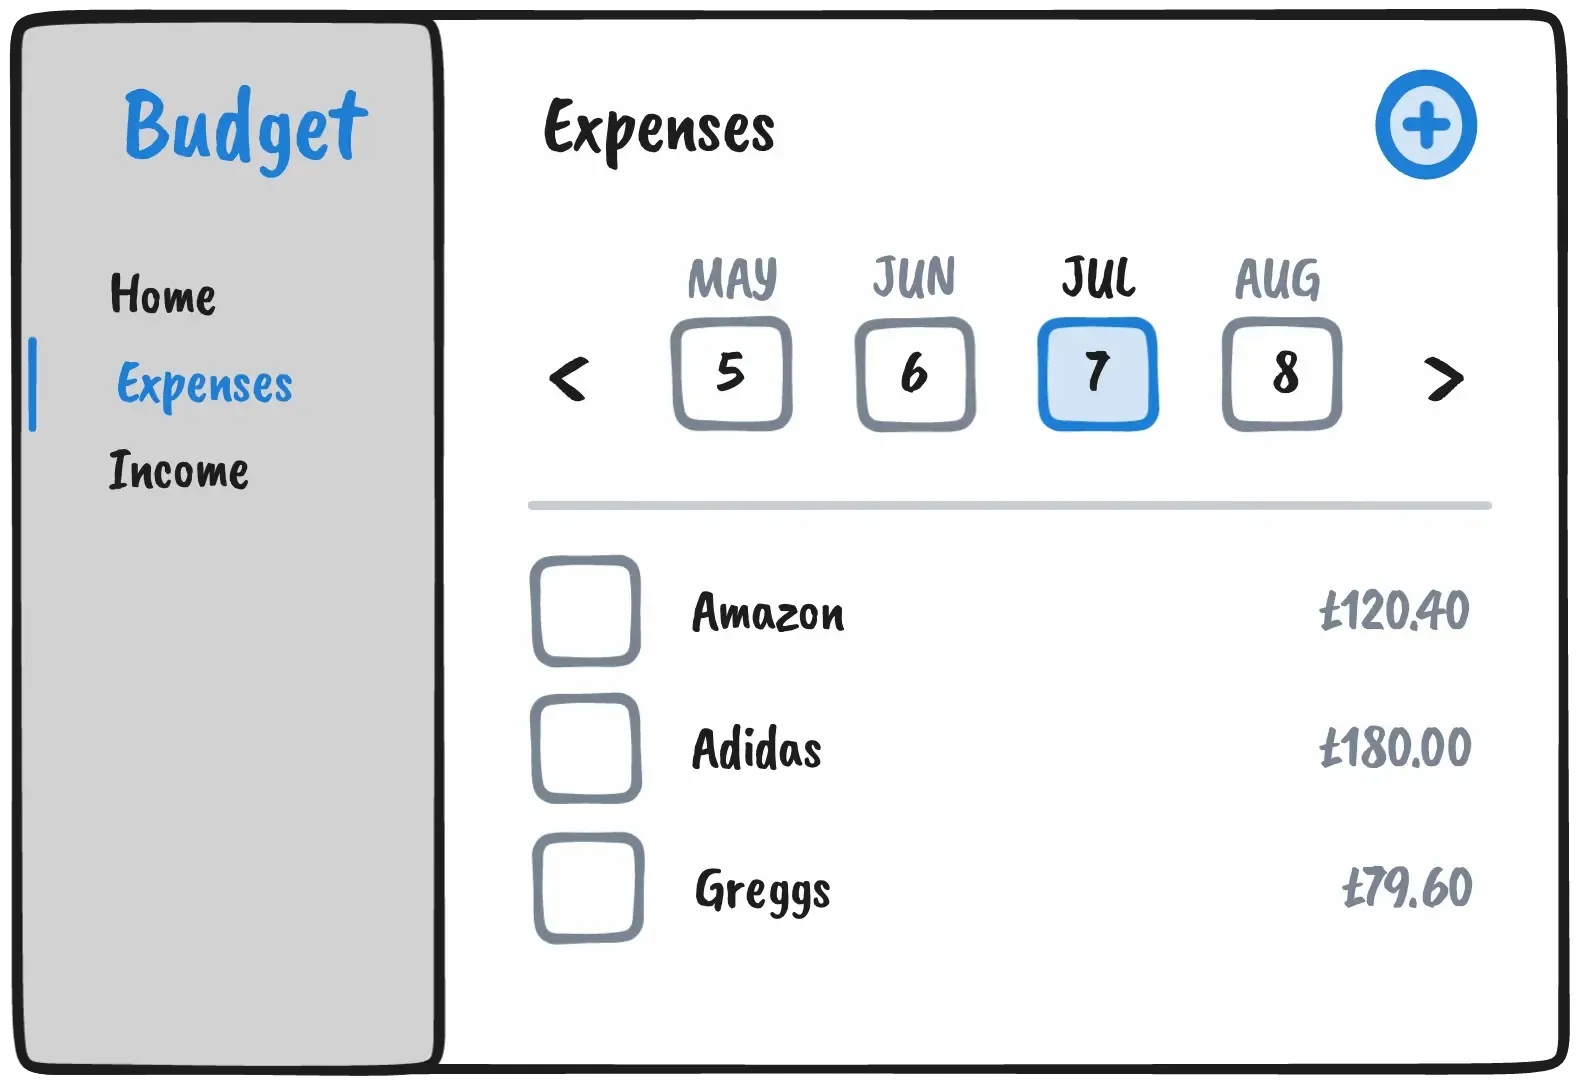
For example, let’s imagine we have a budget app with the following nested routes:
- Root route - a sidebar for navigation
- Expenses route - a date picker that navigates the user to a child dynamic route
$dateroute - a table of expenses, filtered by the date in the URL.
A URL of budget.com/expenses/07-2021 would show the expenses for July 2021.
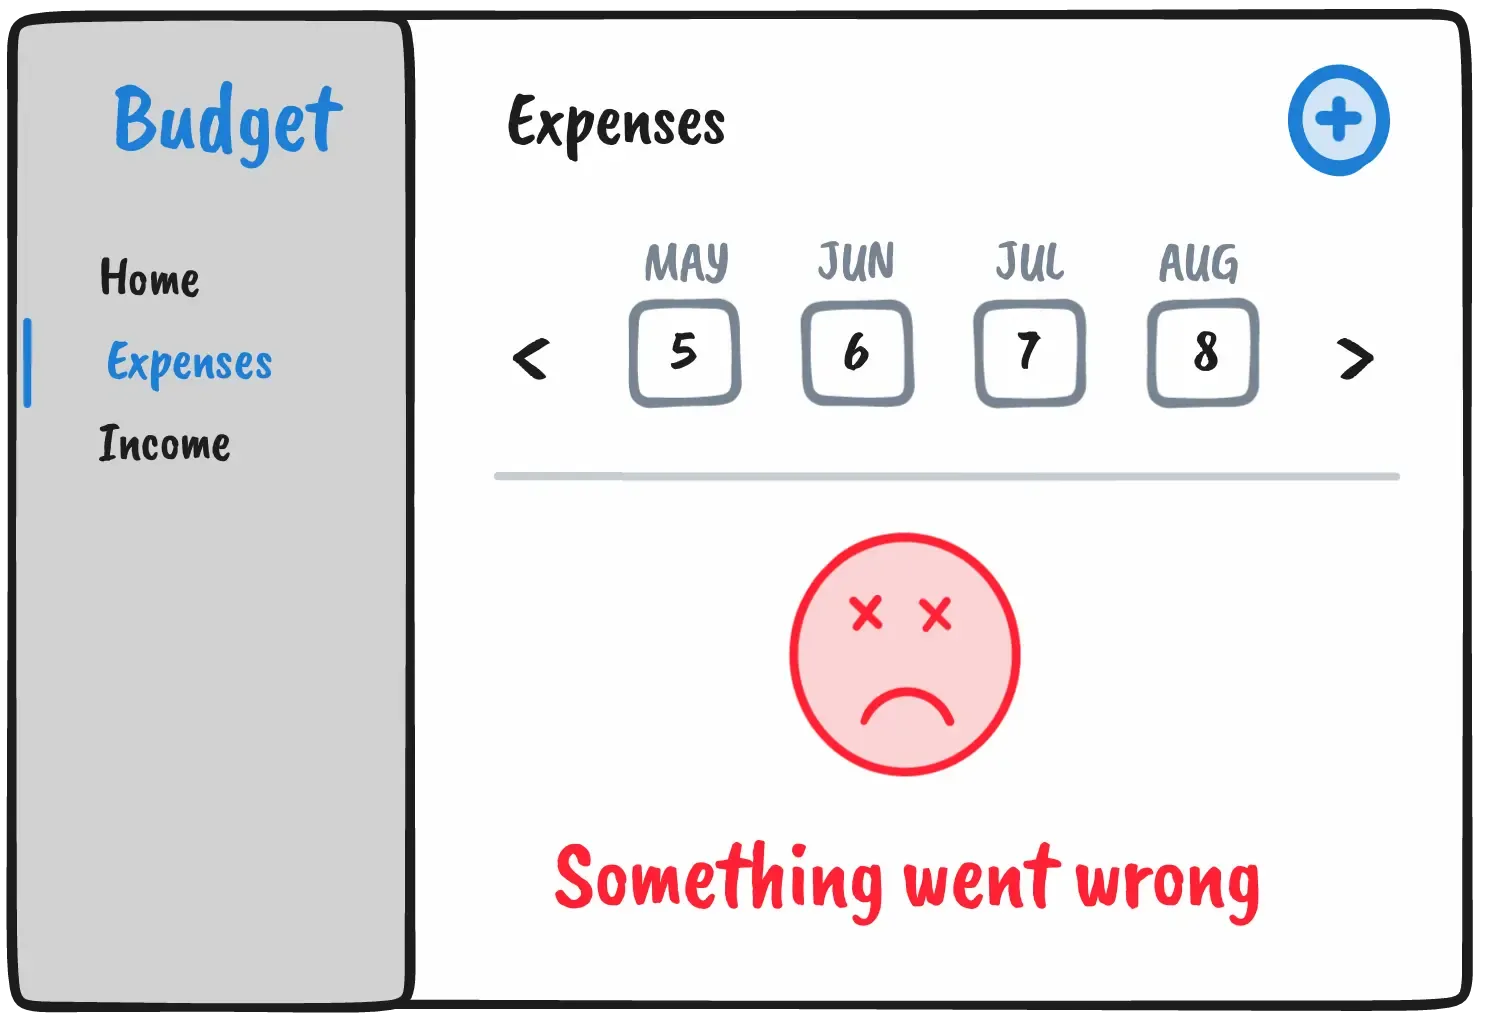
However, a user might try to navigate to a URL with an incorrect date format (e.g. budget.com/expenses/badger-mole).
By using an error boundary in the $date route, we could show an error screen for that route. The rest of the app would continue to function, leaving the user free to choose a valid date by clicking on the date picker. This results in a much nicer user experience.
Replacing State
Let’s think about how we would implement that expenses page with Remix.
If we were to make it without nested routes, we might be tempted to store the currently selected date in state.
Let’s see what nested routes gives us for free that we would need to implement ourselves with state:
- the user can refresh the page and the state is persisted
- the user can use the URL to manage the state - they can bookmark a particular month, send someone a link to a particular month, etc.
- the user can use the browser’s back and forward buttons to navigate between previous states
- previous states are cached in the browser
- all the other benefits mentioned in this post
Once you start realising the power of moving state into routes, the useStates in your app start to vanish.
For example, clicking an “add” button may open up a modal with a form to fill out the initial values for a new expense.
The typical way of handling this would be to use state:
export default function ExpensesPage() {
  const [showAddModal, setShowAddModal] = React.useState(false);

  return (
    <>
      <RestOfPage />
      <AddButton onClick={() => setShowAddModal(true)} />
      {showAddModal ? <AddModal /> : null}
    </>
  );
}
Remix gives us the option of moving the add form to a separate route.
Now, we would no longer need to manage the showAddModal state. The add button would become a link to the /new route.
We can also create an action specific to the /new route that handles adding new expenses.
import { Form, redirect } from 'remix';
import type { ActionFunction } from 'remix';
import Dialog from '~/components/dialog';
import { createExpense } from '~/utils/database.server';

export const action: ActionFunction = async ({ params, request }) => {
  const form = await request.formData();
  const { monthId } = params;
  const description = form.get('description');
  const amount = form.get('amount');
  const date = form.get('date');

  // TODO: validation, error handling, etc.

  await createExpense({
    description,
    amount,
    date,
  });

  return redirect(`/transactions/${monthId}`);
};

export default function AddExpenseRoute() {
  return (
    <Dialog>
      <Form method="post">
        <label>
          Amount: <input type="text" name="amount" />
        </label>
        <label>
          Description: <input type="text" name="description" />
        </label>
        <label>
          Date: <input type="text" name="date" />
        </label>
        <button type="submit">Create Expense</button>
      </Form>
    </Dialog>
  );
}
This gives us a form and an action isolated and co-located in a nested route. To open the modal, we link to the /new route and everything is taken care of for us.
Nested Routes ❤ Remix
Nested routes aren’t unique to Remix. You can implement them in any React app using React Router.
But Remix makes nested routing so easy and powerful that it changes the way you write React apps. A large part of the architecture planning becomes “how should we set up our routes to best take advantage of the nested routing”.
Remix claims that by using Remix, “you’re simply going to build better websites”. From what I’ve seen so far, nested routes are an under-appreciated part of that.